Showing posts with label polka dots. Show all posts

Saturday, July 7, 2018

4th of July Nails

Hey there!
I hope everyone had a stellar 4th of July! If you are reading this from another country, I hope you had an awesome Wednesday celebrating you :)  Every year I try and do some sort of festive nails for the 4th.  In the past I have done more literal versions of patriotic nail art, but this year I wanted to try something a little different.  I apologize ahead of time that there is only one photo, I was only able to get one good one before I started doing things and dragging the design around (I'll explain in a second).  Anyway, here it is!

So I started with a peel off base coat, since I had to take the polish off the next day for work.  I think this is what caused the dragging.  The design wasn't smudged (at least not from this), but it looked like the whole nail was pushed to the side.  I think this may have something to do with the fact that this base coat is meant to peel off relatively easily.  I plan on eventually doing a  comparison on some different peel off base coats when I've tried some more and have some more experience using them.

Anyway, for the base color on all the nails except the ring finger, I used Essie Gel Couture polish in Fairy Tailor.  I may do a post at some point about this line and the polishes I have within it.  I really enjoy this polish as a nice sheer wash of color on the nails.  I used two coats and still have a visible nail line, but that was fine since I covered up the tips anyway.  The colors I used for the dots were OPI Unfor-Greta-bly Blue, Zoya Vanessa (red), and Pop-arazzi Icing on the Cake (white).  I started by putting each color on a business card.  I used several different sized dotting tools to achieve the fading effect.  If you don't have dotting tools, you can use toothpicks and just vary the amount of polish you use.  I tried to make the dots decrease in size as they got closer to the cuticle.  I decided to do each size at once, not each color (does that make sense?), which may have been to my detriment.  The dots of polish on the business card started to dry a bit after a while, so they got a little gummy.  If you could see my other hand you would see little strings of red from after I placed some of the dots.  I kept having to add more polish so that wouldn't happen.  All that to say if you try this I would recommend either doing all of one color at once or testing the polish between rounds.

For my ring fingers I used the same white polish as a base and topped it with OPI Happy Anniversary.  I also sponged on some of OPI Pirouette My Whistle for that glitter.  Not gonna lie, this was not the look I was originally going for.  I originally wanted sparkly silver glitter, but I am totally in love with the result I ended up with! I'm definitely going to have to do this on all my nails sometime.  I've never sponged on this glitter, but now that I've tried it I realize how necessary it is.  It is ordinarily so hard to get those big glitters in there, but sponging is a big help.  I will say, however, use a makeup sponge or something along those lines.  Don't use a sponge-tipped eye shadow applicator like I did.  Not nearly as effective. I topped everything off with Seche Vite top coat.

So those are my 4th of July nails!  Let me know what else y'all would like me to write about, and if you did anything fun for the Fourth I would love to see!  Hope y'all have a great week!
~ Mary Elizabeth

Wednesday, March 6, 2013

Collective Pink Wednesday!

Hey There!
So today I am returning to Pink Wednesday! I have painted my nails pink on several Wednesdays, but I just haven't gotten around to posting them.  So today I decided to post the best of the pink manis I have done lately.  Hope you enjoy!


Alrighty, so this design started with a base of OPI Flashbulb Fuchsia.  This is one of those colors that I didn't like at all when I bought it.  I thought it was too bright for my skin tone.  However, over the last month I realized that I really love this color!  Anyway, I used a dotting tool for the half moon of polka dots.  The polish I used was OPI Pedal Faster, Suzi!  Cute, simple, and pink!


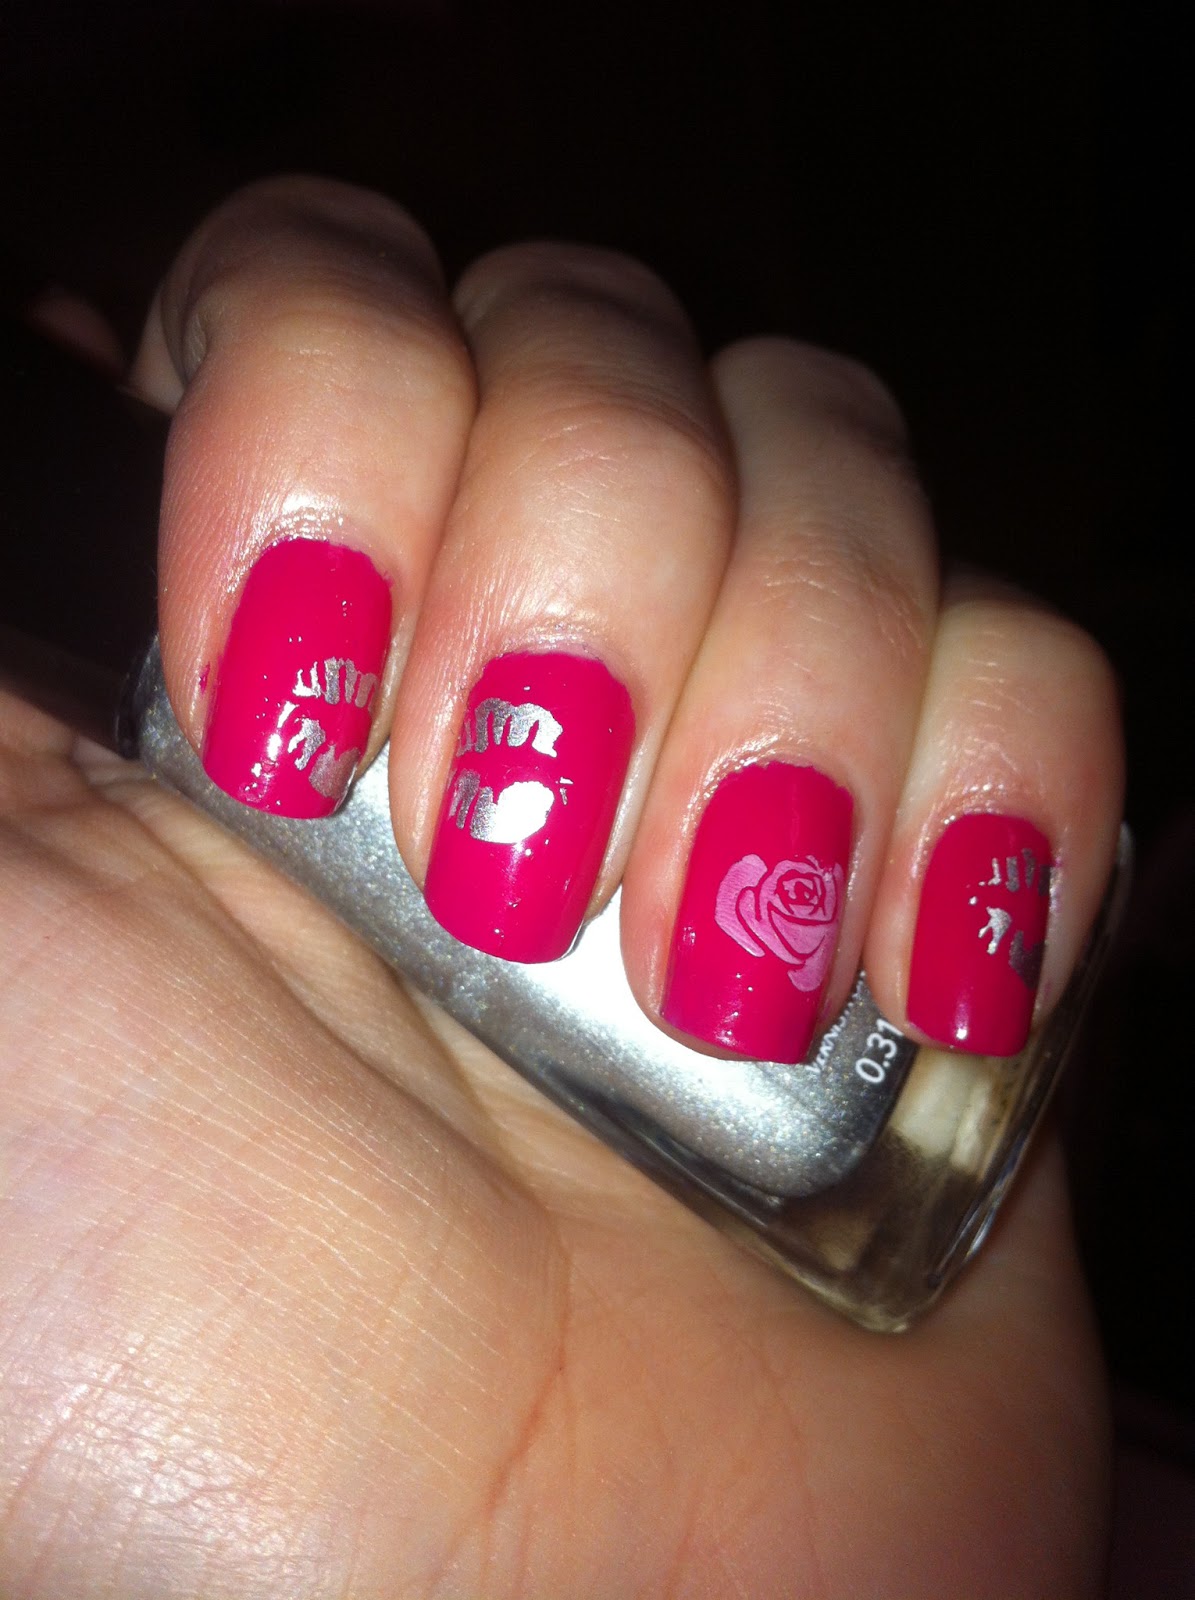
Now this is the look I did for Valentines day, but I never got a chance to do a post about it.  Good thing Pink Wednesday exists!  Anyway, I used Pretty Please Pink Crush for the base of this one.  I used two coats, but one pretty much did the job.  For the lip prints I used Bundle Monster plate BM02 and Sally Hansen Insta-dri in Silver Sweep.  For the rose I used Bundle Monster BM14 and Pretty Please Preppy in Pink.  I thought this was a perfect Valentines day mani :)
I hope y'all enjoyed this post, and I highly encourage you to participate in Pink Wednesday!  Have a wonderful Wednesday!
~ Mary Elizabeth

Sunday, February 24, 2013

First Try: Tribal

Happy Sunday Everyone!
So today's post is another installment in my ongoing First Try series.  Yesterday I was trying to decide what I should do with my nails, and I decided I would give tribal nails a shot.  I hope you enjoy what I came up with!


First of all, I apologize for my nub of a middle finger nail.  This is the nail I broke last week.  Anyway, I started with a base of OPI Suzi's Hungary AGAIN! from the new Euro-Centrale collection.  I will do a review of the polishes I got from that collection soon.  Anyway, in order to create the tribal, I used the black art polish I got from Franchesca's.  Good things: I like the effect that I got with the way the lines go in and out of each other.  Bad things: my lines are a little shaky, and I ended up making my hands a little too symmetrical.  Other than that I really like how this turned out!  I had a fun time deciding what to do for this.  I hope y'all enjoyed, and if you have any questions feel free to leave a comment below.  Have a blessed Sunday!
~ Mary Elizabeth
Humble yourselves, therefore, under God’s mighty hand, that he may lift you up in due time.  Cast all your anxiety on him because he cares for you. 
1 Peter 5:6-7

Thursday, August 9, 2012

Sunny Side Up!

Hey everybody!
So this is my last week in my hometown before I go off to college.  I have been having a lot of fun with my friends this week.  So in honor of my last week of summer, I decided to do some freehand nail art!


So I started with a base of OPI Alpine Snow.  This makes the yellow pop a little more.  Then I used one coat of OPI Need Sunglasses? Once that dried I used an OPI orange (I don't know the exact name of it because it is a mini) to paint a sun on my ring finger.  I carefully created a curved line around the corner of my nail and filled it in.  Then I used dotting tools to create the rays.  I finished it off with one coat of Seche Vite top coat.  I had a lot of fun with this design.  I don't do a ton of freehand designs, so this one was extra special :) I hope you all enjoyed this post, and have a terrific Thursday!
~ Mary Elizabeth

Saturday, March 24, 2012

Polka Dot Party

Hey everybody!
So recently I made a rather large (for me) order on amazon.com.  I haven't been able to do a post on the things I got, but I have posts planned in which I will feature things individually.  One of the things I got is a set of dotting tools.  I decided to try them yesterday.  Here's how it turned out!

I began, of course, with my OPI base coat.  Then I applied two coats of OPI Mermaid's Tears.  This was from the Pirates of the Caribbean collection, but I'm pretty sure it's still available.  The colors I used for the polka dots is OPI Alpine Snow.  To apply the polka dots I used a dotting tool, but you can use a toothpick instead.  I like the dotting tools because I don't have to keep buying toothpicks, but you don't have to go buy dotting tools to achieve this design.  I finished with my SV top coat.  I hope you will try this out! It is super simple, and you can substitute these colors for whatever colors you want.  I hope y'all enjoyed this, and have a super Sunday!
~ Mary Elizabeth